# Create and connect to a Digital Ocean Kubernetes cluster
🗓 January 30, 2020 | 👱 By: Hugh
Welcome to part 1 on my series of posts on creating a scalable Wordpress deployment using Kubernetes. I'm going to be working with Digital Ocean rather than a local installation of minikube, there are enough differences between a real world deployment and a local one that you may as well just start in "the cloud".
I plan to destroy and recreate my cluster fairly regularly so it shouldn't actually cost that much, and I'm trying to burn through $100 free credit anyway.
I'm going to assume you have the following:
- A Digital Ocean account.
- A basic understanding of Kubernetes.
- Installed
kubectl.
Installing doctl
In order to control your cluster,kubectl needs to know how to talk to it. Since I'm using Digital Ocean, the easiest way to do this is to use doctl which is the "Digital Ocean Controller" command line tool. If you were using GKE, you would use the Google Cloud SDK to connect. The instructions to install doctl can be found here. If you are using Ubuntu (or an OS with snap support) you can install it and kubectl integration like this:
$ sudo snap install doctl
$ sudo snap connect doctl:kube-config
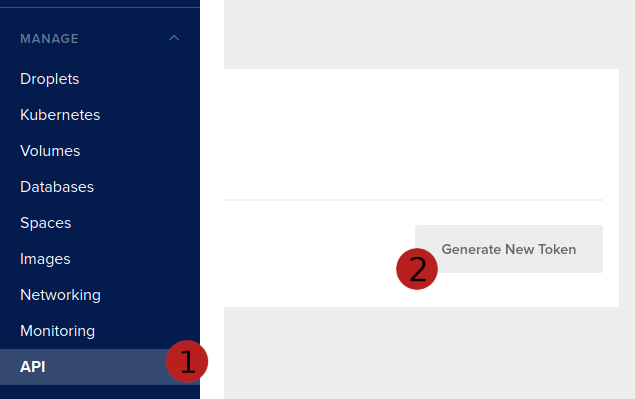
You'll also need to authenticate with your Digital Ocean account, detailed instructions here. This involves creating an API token in the web UI under the API heading:
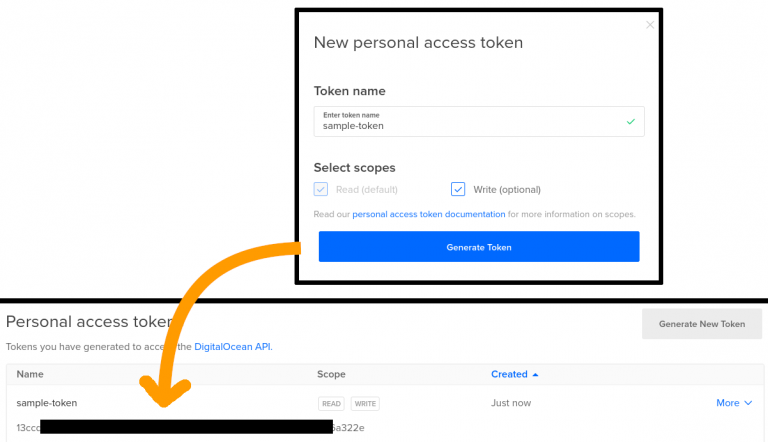
You'll get another dialog box, where you should give your token a name. Be sure to give the token write access.
then running the following:
$ doctl auth init
Enter your token and make sure it is accepted.
Create your cluster
We're going to use the web interface to create the cluster. At this stage I'm not familiar enough with what is available so I like having the options visible to me. If you want to use doctl to setup your cluster in the same way then give it a go!
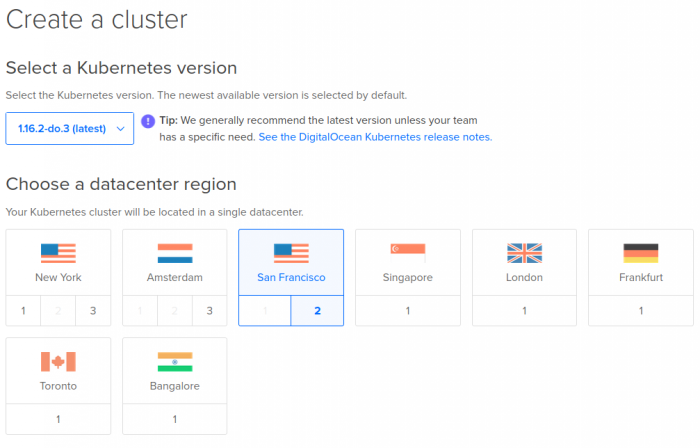
We'll start at the "Create Cluster" page, pick the latest version and choose the region closest to you.
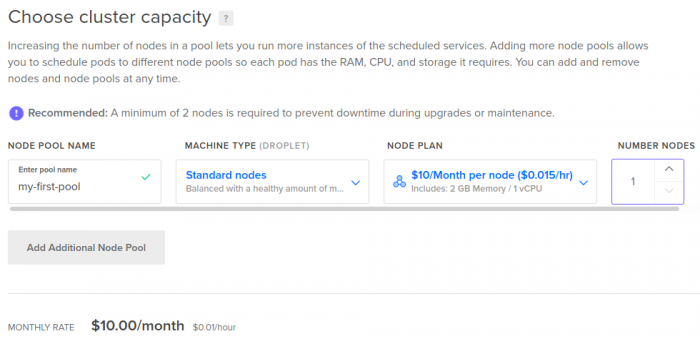
We'll create a single node pool and give it an appropriate name. I decided to just use standard nodes with the lowest specs, and only created a single node to save on costs. Note that in a production deployment you would want at least 2 nodes for redundancy - e.g. if one node is being upgraded or fails for some reason the other one can pick up the slack.
Pick a good name for your cluster, you'll refer to this in some of your kubectl commands so make it easy to type and meaningful.
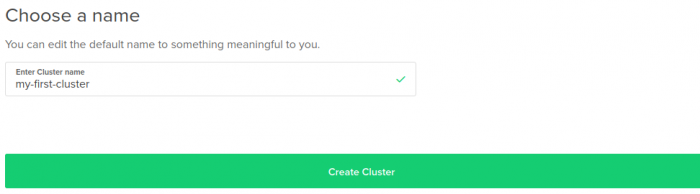
Click "Create Cluster" and your cluster will begin spinning up. You'll be presented with some getting started tips, they're pretty decent, but I'll give a brief summary:
- Make sure your
kubectlversion is within 1 minor version of the one you have deployed. e.g. if your cluster is 1.16, yourkubectlversion must be 1.15, 1.16 or 1.17. - Use the latest
doctlversion. (In an ideal world...but this is less critical) - I highly recommend using automated cert management.
Connect to your cluster
We'll use doctl to fetch/generate our config and add it to the kubectl list of saved configurations. Run the following:
$ doctl kubernetes cluster kubeconfig save my-first-cluster
Obviously replace my-first-cluster with the name you used for your cluster. If you can't remember the name or left it as default, find it by running doctl kubernetes cluster list.
You'll see a note saying the config has been save to ~/.kube/config. If you're interested, have a look what is in there:
$ cat ~/.kube/config
Now confirm that kubectl is connected to your cluster:
$ kubectl config get-contexts
CURRENT   NAME                       CLUSTER                    AUTHINFO                         NAMESPACE
*         do-sfo2-my-first-cluster   do-sfo2-my-first-cluster   do-sfo2-my-first-cluster-admin
Nice.
Now you should be able to run whatever kubectl or helm commands you need to deploy an application!
Deploy a simple application
We're going to deploy a really simple application, based on one of the digital ocean examples. I chose it because it is easy to use and we can trust that digital ocean won't be doing anything dodgy in their image (e.g. some sneaking cryptomining on the side).The Digital Ocean sample manifest is here. I'll reproduce it below as well. Save this to a file called manifest.yaml.
---
kind: Service
apiVersion: v1
metadata:
  name: doks-example
spec:
  type: LoadBalancer
  selector:
    app: doks-example
  ports:
    - name: http
      protocol: TCP
      port: 80
      targetPort: 80
---
apiVersion: apps/v1
kind: Deployment
metadata:
  name: doks-example
spec:
  replicas: 2
  selector:
    matchLabels:
      app: doks-example
  template:
    metadata:
      labels:
        app: doks-example
    spec:
      containers:
      - name: nginx
        image: digitalocean/doks-example
        ports:
        - containerPort: 80
          protocol: TCP
Now to deploy it! This is the easiest part of the whole guide. Run the command below and you'll see the service and deployment created.
$ kubectl apply -f manifest.yaml
service/doks-example created
deployment.apps/doks-example created
It'll take a few minutes to get up and running potentially. So I'll quickly describe what the application is doing. The Service has a type of LoadBalancer. The Digital Ocean Kubernetes Service knows how to interpret this and will create a Load Balancer, forwarding port 80 to the Kubernetes app called doks-example.
The Deployment section will create a "deployement" of 2 replicas of the docker image digitalocean/doks-example, and will expose port 80. The Load Balancer will forward traffic from its external IP to one of the two containers.
So what is the external IP? Hopefully everything has started by now, so run:
$ kubectl get services
NAME           TYPE           CLUSTER-IP      EXTERNAL-IP       PORT(S)        AGE
doks-example   LoadBalancer   10.245.124.28   134.209.143.122   80:31297/TCP   32m
kubernetes     ClusterIP      10.245.0.1      <none>            443/TCP        47m
You're looking for the external IP of the load balancer, in this case 134.209.143.122.
Browse on over to it and check out your freshly deployed Kubernetes App!
# Explore your deployment
Have a look around using kubectl, or if you prefer a visual view, look at the "Kubernetes Dashboard" linked in the Digital Ocean UI. It is actually pretty cool.
Bring it all down
Don't forget to destroy the cluster when you're done. It'll rack up $20 a month for the node and load balancer, or $0.67 per day. Not too much if you're just playing around. Destroy it in the web UI, or run:
doctl k8s cluster delete my-first-cluster
The cluster will go down fairly quickly. The load balancer doesn't always seem to be taken down automatically, so check to make sure it is deleted and if not...delete it.
Done!